0
\$\begingroup\$

Coming from this topic

I have a Model-View-Projection Matrix obtained from a Camera Calibration method, from where I want to render the scene:

-4.7415   -2.3964   -2.4075  253.0431
-2.7923    6.1067    6.1569  143.6573
 0.0000    0.0000    1.0000    1.0000
 0.0061   -0.0094    0.0145    1.0000

As far as I saw, all documentation shows methods to load ModelView and load Projection independently. I was hoping to find something like:

GL.PushMatrix();
GL.MultMatrix(theMVPMatrix);

-> draw/load all the scene 

GL.PopMatrix();

All examples I found show this would run OnPostRender(), but assuming there is a camera, at this point the camera has already rasterized the image. I guess?

edited to make my steps clearer:

Starting a new unity scene. A camera calibration algorithm returns me a matrix \$C\$ such:

 0.00166351   -0.00917993    0.0216692   0.885074
 -0.0120409     0.0087226    0.0119709   0.464458
-1.5839E-05  -1.43059E-05  1.55468E-05  0.0013842

I add a new camera object to the unity scene and name it "projector".

After decomposing \$C\$ into \$R\$, \$K\$ and |T| I can apply rotation and transformation on newly added unity camera, and also extract the projection to apply on the same camera, following this and this steps.

\$R\$

 0.703018  -0.00551996  0.711151
-0.38204    0.8405      0.384195
-0.599843  -0.541784    0.588778

\$K\$

 629.808  -0.986886   633.74
  0        626.035    361.485
  0          0        1

applying position and rotation from R and |T|

projector.transform.position = new Vector3(-30.2851,-30.2294, 30.3633);
projector.transform.rotation = Quaternion.Euler(new Vector3(33.126,-45.329,-0.45));
//Ground truth camera position: 30,30,-30 ; rotation: 33,-45,0

ProjMat:

0.98408 0.00154 0.00978 0.00000
0.0     1.73899 0.00413 0.00000
0.0     0.0     1.001   0.10005
0.0     0.0     -1.0    0.00000

I apply this projection matrix to the unity as suggest:

Projector.projectionMatrix = ProjMat;

Although not constant for each calibration matrix, so far I obtain projector(pink) and ground_truth(green) cameras almost matching.

// Undo view matrix 'V'
var antiView = Projector.transform.localToWorldMatrix;

// Undo model matrix 'M' (assuming this object is not batched).
var antiModel = transform.localToWorldMatrix;
    

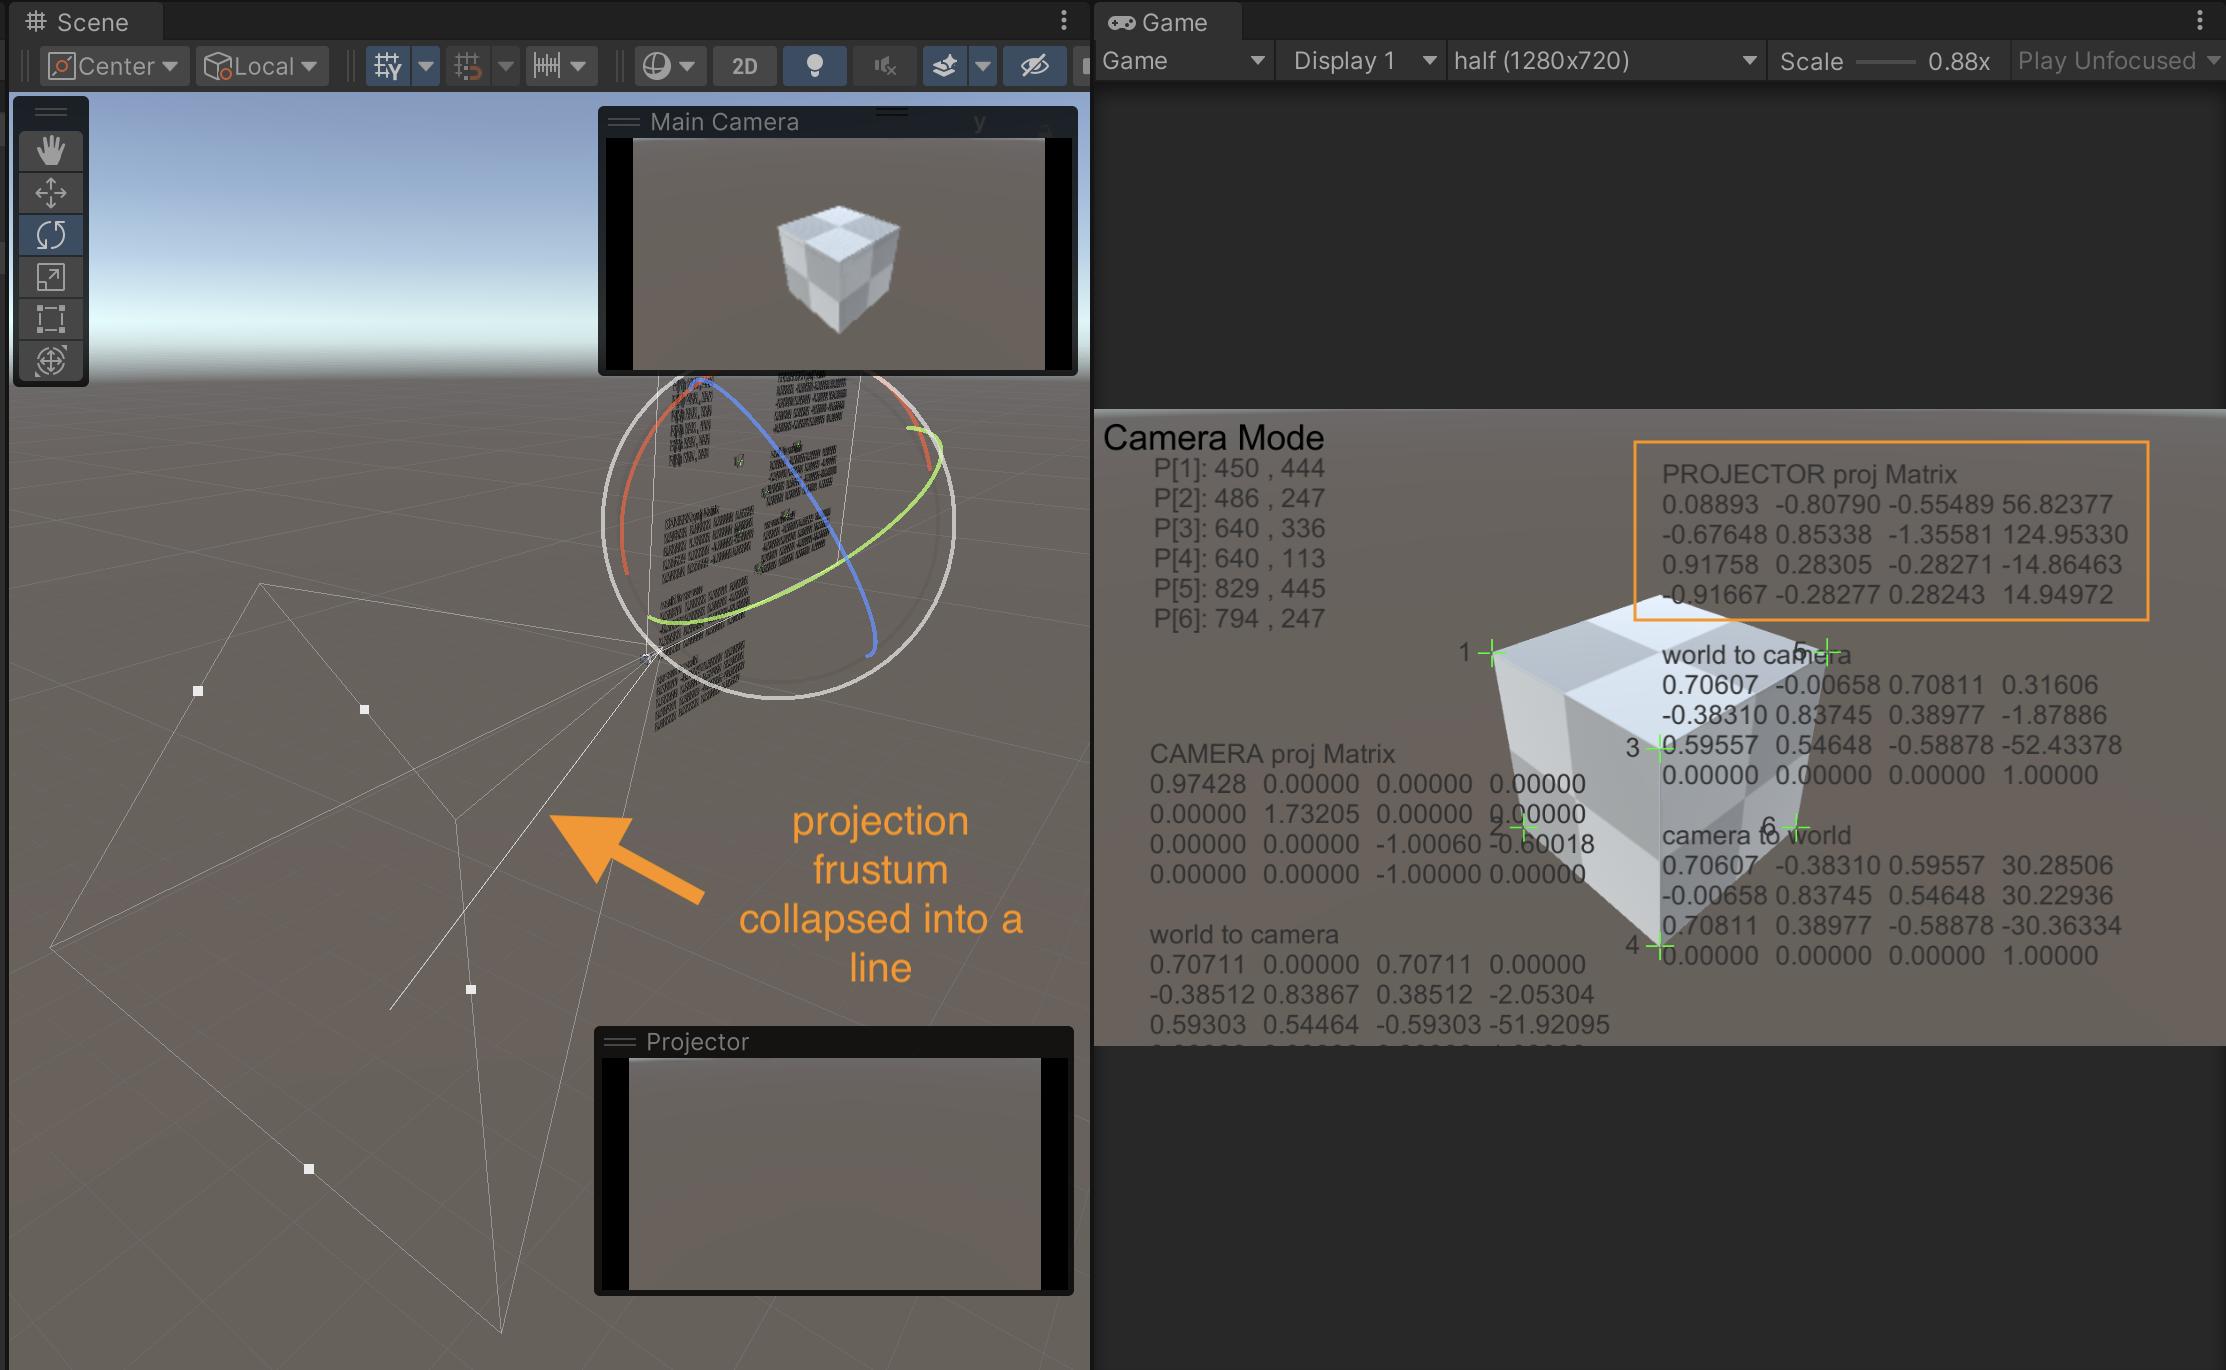
//the moment I enable the line below, my "projector" camera frustum collapses into a line and points somewhere away from the projection center (orange) and values go strange.

Projector.projectionMatrix = ProjMat * antiModel * antiView;

enter image description here

edit2: Added the comparison between Unity and Processing screens while adjusting the calibration points. I am still aiming to obtain a stable matrix transformation, as seen in the Processing window.

\$\endgroup\$
2
  • \$\begingroup\$ This type of thing would usually be accomplished by placing an object with a Camera component at that position/orientation, and using it to render the scene. Can you tell us more about the application you're putting this to, so we can understand the context and suggest appropriate solutions? \$\endgroup\$
    – DMGregory
    Commented Aug 14, 2023 at 1:54
  • \$\begingroup\$ Thank you @DMGregory. On the first 30 seconds of this video, you can see the practical application. I made this application in Processing, where I can render the whole scene multiplied by a matrix between push/pop. It is been a while I am trying to learn how to reproduce this in Unity. This is more or less the final result I would like to obtain \$\endgroup\$
    – Bontempos
    Commented Aug 14, 2023 at 3:14

1 Answer 1

1
\$\begingroup\$

The simplest way to do this is probably to override the camera's projection matrix (see another recent answer), since that will automatically work with any shaders you're already using. You can have a function like this...

public static OverrideProjection(Camera camera, Matrix4x4 newProjection) {
    camera.projectionMatrix = newProjection;
}

This replaces the default projection matrix for your camera, P, with your new matrix, N. So the MVP matrix you render with changes from P * V * M to N * V * M.

But even though this is stacked on the end, you can override the M and V matrices too if you need, something like so:

// Invoked on a MonoBehaviour just before the object gets rendered.
void OnWillRenderObject() {
    // Capture the camera currently being used for rendering.
    var camera = Camera.current;

    // Undo view matrix 'V'
    var antiView = camera.transform.localToWorldMatrix;

    // Undo model matrix 'M' (assuming this object is not batched).
    var antiModel = transform.localToWorldMatrix;

    camera.projectionMatrix = newMatrix * antiModel * antiView;
}

When this is combined with the other matrices in the rendering pipeline, you get...

$$N M^{-1} V^{-1} V M = N M^{-1} M = N$$

So we cancel out the built-in matrices in the pipeline and substitute our own.

If you do this, I'd recommend still trying to position the camera and objects used for rendering reasonably close to their effective arrangement after your matrix substitution. The reason for this is that culling and level of detail are performed based on how objects sit inside the unmodified camera frustum - that system doesn't see your custom matrix, so it might conclude an object is out of view and skip rendering it, even if your custom matrix would have brought it into view.


Another way you can approach this is to write your own shaders for the objects you're rendering, and just directly replace the vertex transformation.

If you make a new unlit shader, you'll see some code like this:

sampler2D _MainTex;
float4 _MainTex_ST;

v2f vert (appdata v)
{
    v2f o;
    o.vertex = UnityObjectToClipPos(v.vertex);
    o.uv = TRANSFORM_TEX(v.uv, _MainTex);
    UNITY_TRANSFER_FOG(o,o.vertex);
    return o;
}

That UnityObjectToClipPos() is basically a macro that maps to mul(UNITY_MATRIX_MVP, v.vertex) (plus some adjustment for stereoscopic rendering when you're using it). We can replace it with our own custom matrix:

sampler2D _MainTex;
float4 _MainTex_ST;
float4x4 _CustomMatrix;

v2f vert (appdata v)
{
    v2f o;
    o.vertex = mul(_CustomMatrix, v.vertex);
    o.uv = TRANSFORM_TEX(v.uv, _MainTex);
    UNITY_TRANSFER_FOG(o,o.vertex);
    return o;
}

You can assign a value to this _CustomMatrix uniform with either Material.SetMatrix(), if you want it to affect just one material/object, or Shader.SetGlobalMatrix(), if you want to set the matrix once and use the same version across all materials.

You can also chain it with any of Unity's built-in matrices, if you don't want to completely replace the model or view matrices.

\$\endgroup\$
6
  • \$\begingroup\$ Thanks for suggesting these alternatives. It would be easier to use the camera component. I have tried to decompose the matrix I have from the camera calibration process into extrinsic / intrinsics and apply each parameter to the unity camera. I failed - the result can be seen after 20 seconds on this video. It seems like the shader solution is more likely to happen. As far as I understand, I can't split my MVP matrix if I don't know at least V, or P, right? unfortunately the camera calibration process will return just the matrices product \$\endgroup\$
    – Bontempos
    Commented Aug 14, 2023 at 13:59
  • \$\begingroup\$ I show an example where you can completely undo the built-in P and V and provide your own P*V instead, so you don't need to be able to split the calibration result. \$\endgroup\$
    – DMGregory
    Commented Aug 14, 2023 at 14:21
  • \$\begingroup\$ I edited my post including some steps I am taking to make sure I am not missing anything out. I can see the light in the end of the tunnel but not sure yet how to get there. \$\endgroup\$
    – Bontempos
    Commented Aug 15, 2023 at 9:17
  • \$\begingroup\$ It looks like you already set up the camera position and rotation to have the values you wanted, and isolated the projection matrix you want to replace, so there's no need to use the antiview/antimodel matrices in this version. You can just stick your projection matrix in place of the camera's default. \$\endgroup\$
    – DMGregory
    Commented Aug 15, 2023 at 13:22
  • \$\begingroup\$ The way I am applying the matrix now only works for few situations. I added a video to the original post where I present side by side the way the matrix transformation renders in Processing compared to Unity while executing the same calibration perturbations. Something tells me if I could multiply the matrices somehow, instead of applying rotation and transformation, I could get a more stable result. I notice after trying to restore and manipulate a matrix using your camera.projectionMatrix = newMatrix * antiModel * antiView line of code. Something else might be out of place. \$\endgroup\$
    – Bontempos
    Commented Aug 17, 2023 at 13:28

You must log in to answer this question.

Not the answer you're looking for? Browse other questions tagged .