3
\$\begingroup\$

I'm trying to reproduce a post-effect with unity seen in the answer here.

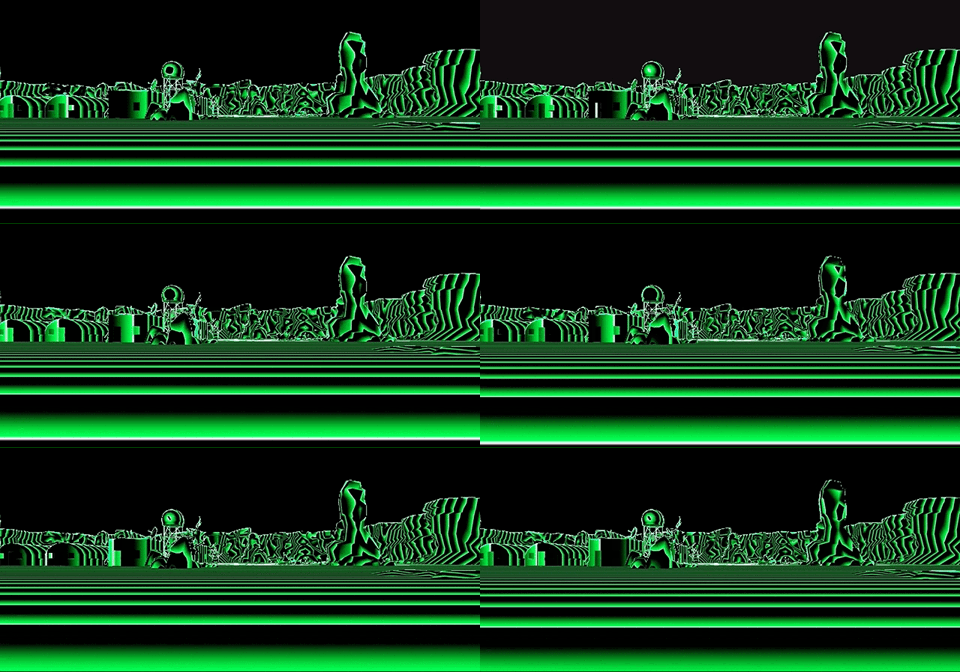
Chromadepth answer screen wave effect

For the moment I just manage to reproduce the wave effect with a quick edge detection. I tried multiple textures but can't find one that fit do the same effect.

I am using this texture enter image description here

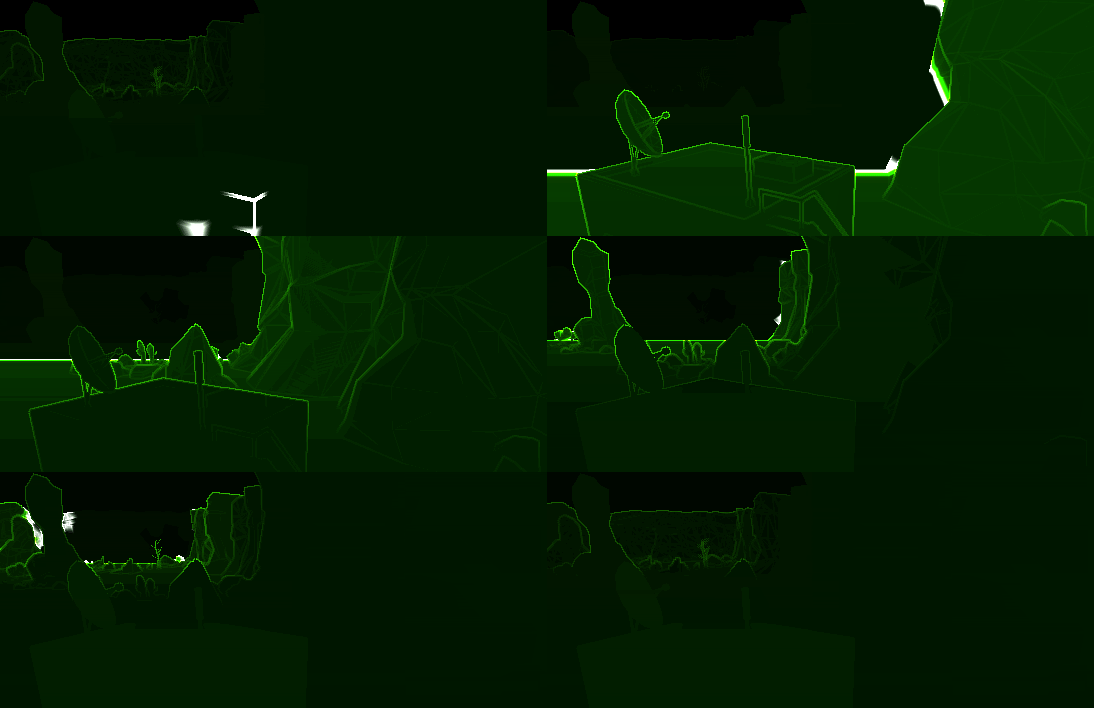
The result for far.
enter image description here

Shader "Unlit/ChromaDepthEdge"
{

    Properties
    {
        _MainTex ("Texture", 2D) = "white" {}
        _Ramp ("Texture", 2D) = "white" {}
        _Threshold("Threshold", Float) = 0.1
    }
    SubShader
    {
      Pass
      {
          ZTest Always Cull Off ZWrite Off
          CGPROGRAM
          #pragma vertex vert
          #pragma fragment frag
          #pragma target 3.0
          #include "UnityCG.cginc"

          struct appdata
          {
              float4 vertex : POSITION;
          };

          sampler2D _MainTex;
          sampler2D _Ramp;
          // Request camera depth buffer as a texture.
          // Incurs extra cost in forward rendering, "just there" in deferred.
          sampler2D _CameraDepthTexture;
          float4 _MainTex_TexelSize;


          float4x4 _InverseViewMatrix;

          float _Threshold;

          void vert (
              float4 vertex : POSITION,
              out float4 outpos : SV_POSITION)
          {
              outpos = UnityObjectToClipPos(vertex);
          }

          fixed4 frag (UNITY_VPOS_TYPE screenPos : VPOS) : SV_Target
          {
              // Convert pixel coordinates into screen UVs.
              float2 uv = screenPos.xy * (_ScreenParams.zw - 1.0f);

              //uv.y = (uv.y *-1) + 1;
              // Depending on setup/platform, you may need to invert uv.y
              // Sample depth buffer, linearized into the 0...1 range.
              float depth = Linear01Depth(
                    UNITY_SAMPLE_DEPTH(tex2D(_CameraDepthTexture, uv)));   

              float2 uvDist = 3 * _MainTex_TexelSize.xy;

              float depthUp =  Linear01Depth(UNITY_SAMPLE_DEPTH(tex2D(_CameraDepthTexture, uv + uvDist * float2(0, 1))));   
              float depthDown =  Linear01Depth(UNITY_SAMPLE_DEPTH(tex2D(_CameraDepthTexture, uv + uvDist * float2(0, -1))));   
              float depthLeft =  Linear01Depth(UNITY_SAMPLE_DEPTH(tex2D(_CameraDepthTexture, uv + uvDist * float2(-1, 0))));   
              float depthRight =  Linear01Depth(UNITY_SAMPLE_DEPTH(tex2D(_CameraDepthTexture, uv + uvDist * float2(1, 0))));   

              float mean = ((depthUp - depth) + (depthDown - depth) + (depthLeft - depth) + (depthRight - depth)) / 4;

              // Compressing the range, so we get more colour 
              // variation close to the camera.
              depth = saturate(2.0f * depth);
              depth = 1.0f - depth;
              depth *= depth;             
              depth = 1.0f - depth;     
              //return depth;


              // Use depth value as a lookup into a colour
              // ramp texture of your choosing. 
              fixed4 colour = tex2D(_Ramp, depth * 6 * _Time.y * 4);

              return lerp(colour, colour * 6, mean > _Threshold);
          }
          ENDCG
      }

    }
}

What did I miss ?

Thanks in advance.

\$\endgroup\$

3 Answers 3

2
\$\begingroup\$

Here's the full shader source I wrote for that previous answer. As I mentioned there, this was just me playing around, so I make no claim that this is a best practice or optimized approach to get this effect. ;)

First up, the pulse wave ramp texture I'm using:

Gradient texture with a thin bright line at the right edge, rapidly fading to dark green and tailing off to near-black toward the left

I'll annotate the code below with comments to explain what I'm doing.

Shader "Shader Workshop/Chromadepth"
{
    Properties
    {
        // Ramp texture for the pulse wave, 
        // with a small bright spot & long tail.
        _MainTex ("Texture", 2D) = "white" {}
        // The speed at which the pulse travels, in cycles per second.
        // So 0.25 = 1 pulse every 4 seconds.
        _Pulse ("Pulse Speed", float) = 0.25
        // Brightness of the edge detection lines.
        _Edge ("Edge Highlight", float) = 1.0
    }
    SubShader
    {
        // Render after all opaque geometry.
        Tags { "RenderType"="Transparent" "Queue"="Transparent-1"}
        LOD 100

        // Don't write to the depth buffer.
        ZWrite Off

        Pass
        {
            CGPROGRAM
            #pragma vertex vert
            #pragma fragment frag
            #pragma target 3.0
            #include "UnityCG.cginc"

            // Capture depth buffer as a readable texture.
            sampler2D _CameraDepthTexture;

            // Define a convenience method for sampling from this buffer.
            float sampleDepth(float2 uv) {
                // Sample depth buffer, linearized into the 0...1 range,
                // where 0 is the near plane and 1 is the far.
                return Linear01Depth(
                        UNITY_SAMPLE_DEPTH(
                            tex2D(_CameraDepthTexture, uv)));
            }

            // Access properties set in Material inspector.
            sampler2D _MainTex;
            float _Pulse;
            float _Edge;

            // Project object vertices to clip space. 
            // Using an out parameter for SV_POSITION beacuse the VPOS
            // semantic we use below doesn't like living alongside SV_POSITION.
            void vert (
                            float4  vertex  : POSITION,
                        out float4  outpos  : SV_POSITION )
            {
                outpos = UnityObjectToClipPos(vertex);
            }

            // Take in the position of this fragment on the screen/render 
            // target using the VPOS semantic, so we can line up exactly 
            // with the rendered scene in the depth buffer we're sampling.
            fixed4 frag (
                    UNITY_VPOS_TYPE screenPos : VPOS) : SV_Target
            {
                // Convert this screen position (in pixels)
                // to a UV coordinate (in the range 0...1).
                // (_ScreenParams.zw is (1/width + 1, 1/height + 1))
                float2 uv = screenPos.xy * (_ScreenParams.zw - 1.0f);

                // For Macs, you may need to set (y = 1.0f - y)
                // ...there's a way to do this cross-platform automatically,
                // but I don't have access to a Mac atm to test it. Sorry!

                // Use our depth sampling method above to get the depth
                // of the scene directly behind the pixel we're drawing.
                float depth = sampleDepth(uv);

                // Initialize the edge detection to zero. Skip calculating
                // an edge detection if we're not going to use it.
                float edge = 0.0f;
                if (_Edge > 0.0f) {

                    // Calculate a 1-pixel offset in x+ y+, x- y- directions.
                    float4 offset = float4(1, 1, -1, -1)
                                    * (_ScreenParams.zwzw - 1.0f);

                    // Read the depth buffer 4 more times at offset positions
                    // to estimate the "average" depth near this pixel.
                    float average = 0.25f * (
                          sampleDepth(uv + offset.xy)
                        + sampleDepth(uv + offset.zy)
                        + sampleDepth(uv + offset.xw)
                        + sampleDepth(uv + offset.zw));

                    // The diference between the depth here and the average
                    // depth nearby will be zero in a flat area, and large
                    // where there's a depth cliff like a silhouette edge.
                    // We'll also get small non-zero values at crests and
                    // valley folds within a silhouette, and taking a square
                    // root helps emphasize this local detail.
                    edge = sqrt(abs(depth - average)) * _Edge;
                }

                // Here I make the depth values non-linear for style.
                // First inverting them so the far z is close to zero.
                depth = 1.0f - depth;
                // Then I square the result so far values get compressed
                // in a narrower range, and we stretch the range of
                // values in the near range (more detail close to the camera)
                depth *= depth;
                // Then finally I invert it back so zero values are near.
                depth = 1.0f - depth;

                // Change our depth value into a lookup into our warve texture.
                // This gives exactly one pulse at a time - the front wave needs
                // to reach the far plane before wrapping around to near again.
                // Increase that 1.0f * if you want multiple concurrent pulses.
                float samplePos = float4(1.0f * depth.xx, 0.0f, 0.0f);
                // Shift this sample window over time. (Set texture to repeat)
                samplePos.x -= _Pulse * _Time.y;

                // Sample the wave ramp texture at our computed sample position.
                fixed4 colour = tex2Dlod(_MainTex, samplePos);

                // Add edge brightening, tinted by the colour from the wave.
                colour *= (colour * (2.0f + edge * 30.0f) + edge * 5.0f);

                // Output our finished colour.
                return colour;
            }       
            ENDCG
        }
    }
}

Note that since this version crosses your entire depth range before looping around to fire a new pulse, the wave will move very quickly with Unit's default camera settings. To handle very large scenes, Unity's camera far plane default quite a high depth - much deeper than the level I was using this shader in - so I pulled the far plane in closer to get more depth values nearby where I want them, making the wave super smooth.

For a scene with longer sightlines, you may want to fire multiple concurrent pulses as described in the comments above, so you can slow down the pulse movement without starving the nearby areas waiting for the wave to come back around.

\$\endgroup\$
3
  • \$\begingroup\$ Thanks for sharing your shader code. I really appreciate. But I can't get the good texture to fit your effect. :( Could you post the texture you're using ? Thanks in advance. \$\endgroup\$
    – tuyasa
    Commented Jul 19, 2017 at 15:53
  • 1
    \$\begingroup\$ Added the texture. It's pretty similar to yours, just flipped so the "deep" side of the wave is to the right, and with a sharper falloff immediately before & after, with a long very dark (but non-zero green) tail. \$\endgroup\$
    – DMGregory
    Commented Jul 19, 2017 at 16:30
  • \$\begingroup\$ Yes, indeed I had the texture almost right. I will study your shader code to deeply understand the concept of depth buffer. Thanks for explanation ! \$\endgroup\$
    – tuyasa
    Commented Jul 19, 2017 at 19:04
0
\$\begingroup\$

Having actually looked at a similar effect in a HoloLens shader, what you're missing is a value that represents the distance the wave-pulse edge is at and optionally, a center point (although you can cheat and simply treat the camera as the center all the time).

That pulse edge is then changed over time (in the HoloLens case, via a MonoBehaviour script), likely through the user of a MaterialPropertyBlock.

You may wish to just take the HoloLens shader and modify it.

\$\endgroup\$
0
\$\begingroup\$

Make sure that your texture is not set to repeating, but rather set to clamp. This should create the effect that you're looking for, I believe.

\$\endgroup\$
2
  • 1
    \$\begingroup\$ I wrote the example shader OP is referencing, using repeat sampling to make the wave wrap around again. To do this with clamping you'd need some extra shader code to wrap the texture coordinates manually - otherwise you'd get only one pulse ever, then black for the rest of eternity. ;) \$\endgroup\$
    – DMGregory
    Commented Jul 18, 2017 at 17:24
  • \$\begingroup\$ Oh, well... I suppose that makes sense based on how it's written. And you would know lol! Thanks for clearing that up. \$\endgroup\$ Commented Jul 18, 2017 at 17:48

You must log in to answer this question.

Not the answer you're looking for? Browse other questions tagged .