23
\$\begingroup\$

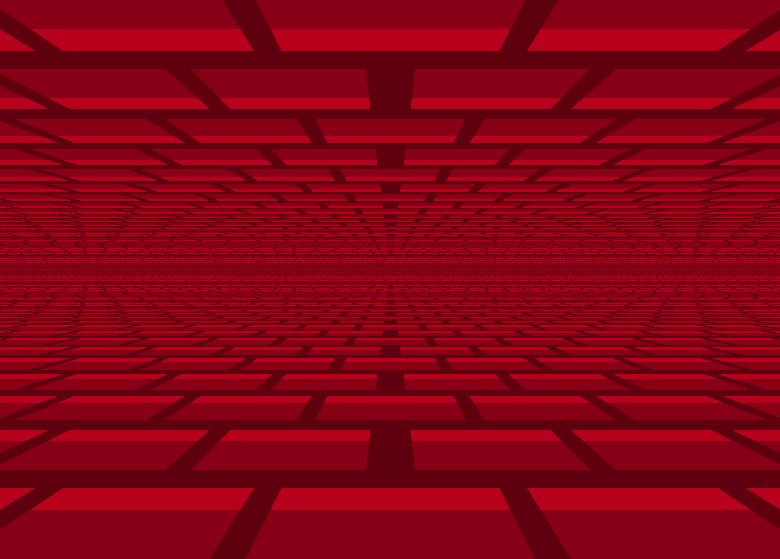
Is there such a thing as a short answer on how to do a Mode 7 / mario kart type effect in pygame?

I have googled extensively, all the docs I can come up with are dozens of pages in other languages (asm, c) with lots of strange-looking equations and such.

Ideally, I would like to find something explained more in English than in mathematical terms.

I can use PIL or pygame to manipulate the image/texture, or whatever else is necessary.

I would really like to achieve a mode 7 effect in pygame, but I seem close to my wit's end. Help would be greatly appreciated. Any and all resources or explanations you can provide would be fantastic, even if they're not as simple as I'd like them to be.

If I can figure it out, I'll write a definitive how to do mode 7 for newbies page.

edit: mode 7 doc: http://www.coranac.com/tonc/text/mode7.htm

\$\endgroup\$
11
  • 5
    \$\begingroup\$ there seems to be equations here: en.wikipedia.org/wiki/Mode_7 Although, these days we have 3D acceleration, things like Mode 7, or the whacky way doom worked are more of a curiosity than a solution. \$\endgroup\$ Commented Mar 4, 2012 at 12:27
  • 3
    \$\begingroup\$ @2D_Guy this page explain the algorithm very well for me. You want to know how to do it, or you want it already implemented for you? \$\endgroup\$ Commented Mar 5, 2012 at 3:53
  • 1
    \$\begingroup\$ @stephelton On the SNES systems, the only layer that could be distorted, rotated..(applied affine transformations with matrices) is the seventh layer. The Background layer. All other layers were used to simple sprites, So if you wanted a 3D effect, you had to use this layer, this is where the name came from :) \$\endgroup\$ Commented May 8, 2012 at 11:02
  • 3
    \$\begingroup\$ @GustavoMaciel: That's a bit inaccurate. The SNES had 8 different modes (0-7), in which up to 4 background layers had different functionality, but only one mode (mode 7, hence the name) supported rotation and scaling (and also restricted you to a single layer). You couldn't really combine the modes. \$\endgroup\$ Commented May 8, 2012 at 15:30
  • 1
    \$\begingroup\$ @Michael : i would also add : SNES was one of the first popular console to use this effect in the 90's (with game F-Zero), and that's why after that people start referring all 2D horizontal texture-mapped plane effects seen in other games as "mode 7". In reality, this kind of effect was not new and existed long time ago in arcade, cf. Space Harrier/Hang-On (1985). \$\endgroup\$
    – tigrou
    Commented May 8, 2012 at 18:45

2 Answers 2

50
\$\begingroup\$

Mode 7 is a very simple effect. It projects a 2D x/y texture (or tiles) to some floor/ceiling. Old SNES use hardware to do this, but modern computers are so powerful that you can do this realtime (and no need of ASM as you mention).

Basic 3D math formula to project a 3D point (x, y, z) to a 2D point (x, y) is:

x' = x / z;
y' = y / z; 

When you think about it, it makes sense. Objects that are far in the distance are smaller than objects near you. Think about railroad tracks going to nowhere:
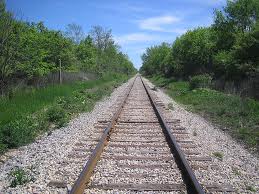
railroad tracks heading away to the horizon

If we look back at the formula's input values: x and y will be the current pixel we are processing, and z will be distance information about how far the point is. To understand what z should be, look at the picture, it shows z values for image above:
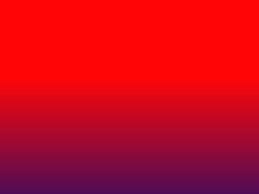
rectangle with purple on bottom and red on top, with a gradual transition to less blue component the higher you go

purple = near distance, red = far away

So in this example, z value is y - horizon (assuming (x:0, y:0) is at the center of screen)

If we put everything together, it becomes: (pseudocode)

for (y = -yres/2 ; y < yres/2 ; y++)
  for (x = -xres/2 ; x < xres/2 ; x++)
  {
     horizon = 20; //adjust if needed
     fov = 200; 

     px = x;
     py = fov; 
     pz = y + horizon;      
  
     //projection 
     sx = px / pz;
     sy = py / pz; 

     scaling = 100; //adjust if needed, depends of texture size
     color = get2DTexture(sx * scaling, sy * scaling);  
     
     //put (color) at (x, y) on screen
     ...
  }

One last thing: if you want to make a Mario Kart game, I suppose you also want to rotate the map. Well it's also very easy: rotate sx and sy before getting the texture value. Here is the formula:

  x' = x * cos(angle) - y * sin(angle);
  y' = x * sin(angle) + y * cos(angle);

and if you want to move through the map, just add some offset before getting the texture value:

  get2DTexture(sx * scaling + xOffset, sy * scaling + yOffset);
  

NOTE: I tested the algorithm (almost copy-paste) and it works. Here is the example: http://glslsandbox.com/e#26532.3 (requires recent browser and WebGL enabled)
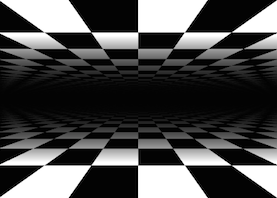
black and white tile effect on floor and ceiling going off into the distance

NOTE2: I used simple math because you said you want something simple (and don't seems familiar with vector math). You can achieve the same things using the Wikipedia formula or tutorials you give. The way they did it is much more complex but you have much more possibilities for configuring the effect (in the end it works the same...).

For more information, I suggest reading this Wikipedia article about perspective projection.

\$\endgroup\$
1
  • \$\begingroup\$ One thing to add, since the sin and cos of the angle are mostly constant per frame, be sure to calculate them outside of the loop for figuring out all the x, y positions. \$\endgroup\$ Commented Jul 8, 2015 at 12:16
4
\$\begingroup\$

Here is the code to make it. I is the same code of the tutorial that I made on my blog. Check there to learn the Mode 7 method and the RayCasting.

Basically, the pseudo code is it:

//This is the pseudo-code to generate the basic mode7

for each y in the view do
    y' <- y / z
    for each x in the view do
        x' <- x / z
        put x',y' texture pixel value in x,y view pixel
    end for
    z <- z + 1
end for

Here is the code that I made in JAVA, following my tutorial.

package mode7;

import java.awt.image.BufferedImage;
import java.io.File;
import java.io.IOException;
import javax.imageio.ImageIO;
import javax.swing.JFrame;

/**
 * Mode 7 - Basic Implementation
 * This code will map a texture to create a pseudo-3d perspective.
 * This is an infinite render mode. The texture will be repeated without bounds.
 * @author VINICIUS
 */
public class BasicModeSeven {

    //Sizes
    public static final int WIDTH = 800;
    public static final int WIDTH_CENTER = WIDTH/2;
    public static final int HEIGHT = 600;
    public static final int HEIGHT_CENTER = HEIGHT/2;

    /**
     * @param args the command line arguments
     */
    public static void main(String[] args) throws IOException {

        //Create Frame
        JFrame frame = new JFrame("Mode 7");
        frame.setSize(WIDTH, HEIGHT);
        frame.setDefaultCloseOperation(JFrame.EXIT_ON_CLOSE);
        frame.setLocationRelativeTo(null);
        frame.setVisible(true);

        //Create Buffered Images:
        //image - This is the image that will be printed in the render view
        //texture - This is the image that will be mapped to the render view
        BufferedImage image = new BufferedImage(WIDTH, HEIGHT, BufferedImage.TYPE_INT_RGB);
        BufferedImage texture = ImageIO.read(new File("src/mode7/texture.png"));

        //The new coords that will be used to get the pixel on the texture
        double _x, _y;

        //z - the incrementable variable that beggins at -300 and go to 300, because 
        //the depth will be in the center of the HEIGHT
        double z =  HEIGHT_CENTER * -1;

        //Scales just to control de scale of the printed pixel. It is not necessary
        double scaleX = 16.0;
        double scaleY = 16.0; 

        //Mode 7 - loop (Left Top to Down)
        for(int y = 0; y < HEIGHT; y++){

            _y = y / z; //The new _y coord generated
            if(_y < 0)_y *= -1; //Control the _y because the z starting with a negative number
            _y *= scaleY; //Increase the size using scale
            _y %= texture.getHeight(); //Repeat the pixel avoiding get texture out of bounds 

            for(int x = 0; x < WIDTH; x++){

                _x = (WIDTH_CENTER - x) / z; //The new _x coord generated
                if(_x < 0)_x *= -1; //Control the _x to dont be negative
                _x *= scaleX; //Increase the size using scale
                _x %= texture.getWidth(); //Repeat the pixel avoiding get texture out of bounds 

                //Set x,y of the view image with the _x,_y pixel in the texture
                image.setRGB(x, y, texture.getRGB((int)_x, (int)_y));
            }

            //Increment depth
            z++;
        }

        //Loop to render the generated image
        while(true){
            frame.getGraphics().drawImage(image, 0, 0, null);
        }
    }
}

The result is:

enter image description here

\$\endgroup\$
1
  • 2
    \$\begingroup\$ The explanation is here programandocoisas.blogspot.com.br. You can find there the tutorial step by step to make this effect. But I will update my post so to put the comments to be better ;). \$\endgroup\$ Commented Sep 17, 2017 at 18:39

You must log in to answer this question.

Not the answer you're looking for? Browse other questions tagged .